How to Make Your Time Lapse Loop Seamlessly
This post is also available in: Deutsch (German)
Video loops are in demand! In this post, we show you how to turn your existing time lapses into short, seamless video loops that make ideal social media posts, website wallpaper and more. Give your time lapses added commercial value by following these simple steps in Adobe Premiere, Photoshop or After Effects.
Instagram. Facebook. Twitter. One after the other, each of the world’s leading social media platforms have introduced auto-looping video to their platforms in recent years. This has generated exciting new opportunities, not only for marketers but also for content creators. It has thrust looping video content of all shapes and sizes into the spotlight. Whether cinemagraphs, wigglegrams, boomerangs or endless time lapses — looping video formats are a growing trend.
Google searches for “video loop” have steadily gained momentum over the last 15 years.
From an advertiser’s point of view the benefits are obvious. Social media marketers love moving image content because it’s more likely to catch the consumer’s eye. Videos generate higher engagement than static images and draw viewers in for longer — particularly if the video is played back in an endless loop. For similar reasons videos are replacing photographs as backgrounds and wallpaper on websites, and web-design agencies often prefer short, seamless video loops to long video files that weigh websites down.
This growing demand for video loops presents a big opportunity for creators. Especially for time lapse photographers already sitting on a treasure-trove of content, which lends itself to looping. Canadian time lapse expert Tyler Lillico is one such creator. He has been tapping into the video loop market for several years, giving his epic time lapses of the Rocky Mountains added value, by turning them into loops and cinemagraphs.
Tyler Lillico gives his epic time lapses added value by turning them into seamless loops and cinemagraphs.
“Creating loops from time lapses is a no-brainer for me,” says Lillico. “Many time lapses, even old footage, meet all the requirements for creating loops: they are usually shot on a tripod with static framing, which is the perfect combination. The resulting loop or cinemagraph is a more polished product that has a much greater commercial appeal.”
“Creating looped time lapses as a product offering will put you ahead of the curve.”
– Tyler Lillico, Time Lapse Loop Creator
Preparing Your Time Lapse
Luckily, creating loops from your time lapses is simple. Essentially, you only need two things: (1) a video file of your time lapse sequence in the highest possible quality and (2) video-editing software, such as Adobe Premiere, Photoshop or After Effects. There are a number of ways to create a video file from your time lapse photos — for instance by creating a new video layer from a series of photos using Photoshop. Personally, I like to use the Timelapse Assembler freeware for Mac to create a video clip.
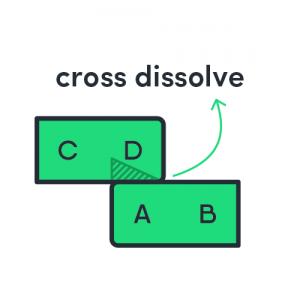 The following tutorials will assume that you have already exported your time lapse as a video file. Each of the following tutorials demonstrates how to apply a cross dissolve, so that your time lapse loops seamlessly and gives the appearance of being infinite. This technique works especially for timelapses involving clouds, light-trails, water and traffic.
How to Create a Seamless Loop of Your Time Lapse in Adobe Photoshop CC
1. Create a new “Video Group” by dragging your video file onto the Photoshop icon. The video timeline will automatically appear with your video clip on it.
2. Reduce the length of the video to 10 seconds or less.
3. Now split your video into two, by placing your cursor near the middle of your time lapse and clicking on the scissor icon.
4. Next, in your Layer control panel, pull the layer entitled “Layer 1 copy” out of the video group. “Layer 1 copy” should now appear one track above “Layer 1” on the timeline.
5. Pull the clip “Layer 1 copy” forward to the beginning of your timeline and pull Layer 1 behind “Layer 1 copy”, leaving a little bit of an overlap.
6. Now click the Transitions icon and pull the “fade” icon onto the end of “Layer 1 copy” clip. Make sure that the transition does not exceed the overlapping region, otherwise you’ll get the background layer showing in your loop.
7. You can check whether your time lapse plays back in a loop by selecting “Loop Playback” from the Timeline’s control panel. If your time lapse loops seamlessly, it is ready to be exported.
How to Create a Seamless Loop of Your Time Lapse in Adobe Premiere Pro CC
1. Import your video file.
2. Create a new sequence from your video.
3. Reduce the length of the video to 10 seconds or less.
4. Using the Razor tool, cut your video into two clips: Clip A and Clip B.
5. Now move Clip A one track above and just behind Clip B on the timeline. Leave an overlap of about 10 or 20 frames.
6. Right-click and add a cross-dissolve transition to the beginning of Clip A, so that it fades into Clip B. Make sure that it does not exceed the overlapping region, otherwise you’ll get the background layer showing in your loop.
7. You can check whether your time lapse plays back in a loop by selecting “Loop” from the control panel of the viewer (Wrench icon). Also double-check that you’ve set your in and out points correctly. If your time lapse loops seamlessly, it is ready to be exported.
How to Create a Seamless Loop of Your Time Lapse in Adobe After Effects CC
1. Import your video file.
2. Right-click on the clip and create a new comp.
3. Reduce the length of the video to 10 seconds or less.
4. Now split your video into two by placing your cursor near the middle of your video clip. Go to the “Edit” menu and select “Split Layer” or use the shortcut “Shift + CMD + D”.
5. You should now have two layers. Move the clip in Layer 1 forward to the beginning of your timeline, and the clip in Layer 2 behind the clip in Layer 1, leaving a little bit of an overlap.
6. Now open up your transform controls for Layer 1. Under “Opacity” place keyframes at the beginning and end of the overlapping region. Start at 100% and end at 0%. The first clip should now fade into the second. Make sure that your fade does not exceed the overlapping region, otherwise you’ll get the background layer showing in your loop.
7. If your time lapse loops seamlessly, it is ready to be exported.
Monetizing Your Loops
That’s it! You’re all set. Now that you know how to create looping time lapses, you just need to get them seen by the right people — potential buyers. One way of reaching your target audience is by showcasing your work through a stock provider such as gallereplay. Our platform caters specifically to brands, agencies and freelancers in search of looping video content like endless time lapses. When you’re selected to join our community, you also receive a slick-looking portfolio page, free cloud space/embed codes for your work, and more.
Applying to gallereplay is short and painless, so get in touch — we look forward to seeing your loops!
